Fork me on GitHub
Suzf  Blog

Archive Linux

Ceph 单/多节点 安装小结

概述

Docs : http://docs.ceph.com/docs

Ceph是一个分布式文件系统,在维持POSIX兼容性的同时加入了复制和容错功能。Ceph最大的特点是分布式的元数据服务器,通过CRUSH(Controlled Replication Under Scalable Hashing)这种拟算法来分配文件的location。Ceph的核心是RADOS(ReliableAutonomic Distributed Object Store),一个对象集群存储,本身提供对象的高可用、错误检测和修复功能。

Ceph生态系统架构可以划分为四部分:

client:客户端(数据用户)。client向外export出一个POSIX文件系统接口,供应用程序调用,并连接mon/mds/osd,进行元数据及数据交互;最原始的client使用FUSE来实现的,现在写到内核里面了,需要编译一个ceph.ko内核模块才能使用。
mon:集群监视器,其对应的daemon程序为cmon(Ceph Monitor)。mon监视和管理整个集群,对客户端export出一个网络文件系统,客户端可以通过mount -t ceph monitor_ip:/ mount_point命令来挂载Ceph文件系统。根据官方的说法,3个mon可以保证集群的可靠性。
mds:元数据服务器,其对应的daemon程序为cmds(Ceph Metadata Server)。Ceph里可以有多个MDS组成分布式元数据服务器集群,就会涉及到Ceph中动态目录分割来进行负载均衡。
osd:对象存储集群,其对应的daemon程序为cosd(Ceph Object StorageDevice)。osd将本地文件系统封装一层,对外提供对象存储的接口,将数据和元数据作为对象存储。这里本地的文件系统可以是ext2/3,但Ceph认为这些文件系统并不能适应osd特殊的访问模式,它们之前自己实现了ebofs,而现在Ceph转用btrfs。

Ceph支持成百上千甚至更多的节点,以上四个部分最好分布在不同的节点上。当然,对于基本的测试,可以把mon和mds装在一个节点上,也可以把四个部分全都部署在同一个节点上。

Windows上传文件到Linux文件名称乱码解决

众所周知, Windows 和 Linux 系统所使用的编码格式是不同的;Winddows 默认编码是GB2312,而Linux系统默认编码是UTF-8。如果想将Windows的文件移动到Linux系统后,文件名称不发生乱码,这时候该怎么办呢?

要想正确显示,要么修改Linux系统编码为GB2312,要么修改文件名编码(文件内容不修改)。显然第一种方式不太可取,那么我们就将文件名称的编码格式转换成UTF-8。

Linux 中有这么一个工具 convmv - converts filenames from one encoding to another

安装方式

 # Centos
 yum -y install convmv

 # Debian
 apt-get install convmv

语法及主要参数

convmv [options] FILE(S) … DIRECTORY(S)
主要选项:
-f ENCODING  指定目前文件名的编码,如-f gbk, gb2312
-t ENCODING  指定将要转换成的编码,如-t utf-8
-r           递归转换目录下所有文件名
–list        列出所有支持的编码
–notest      默认是只打印转换后的效果,加这个选项才真正执行转换操作。
更多选项请 man convmv。

实例

# 递归转换一个目录下所有文件名称
@_@[15:19:44][007@happycode notes]$convmv -f gb2312 -t UTF-8 --notest -r  TXT
mv "TXT/Sublime/Package Controlʨ׃´	"TXT/Sublime/Package Control设置代理"
mv "TXT/Sublime/°²װPackage control"	"TXT/Sublime/安装Package control"
mv "TXT/A_Linux/Tcpdump/tcpdump ļ®µŊ¹ԃ"	"TXT/A_Linux/Tcpdump/tcpdump 命令的使用"
mv "TXT/A_Linux/Others/Dell·þϱǷ¹̼þʽ¼¶"	"TXT/A_Linux/Others/Dell服务器固件升级"
mv "TXT/A_Linux/Others/ʨ±¸א¶ϰ?½͘¶¨CPU(SMP IRQ Affinity)"	"TXT/A_Linux/Others/设备中断绑定到特定CPU(SMP IRQ Affinity)"
mv "TXT/A_Linux/Others/Ubuntu LinuxϵͳЂapt-getļ®Ъ½	"TXT/A_Linux/Others/Ubuntu Linux系统下apt-get命令详解"
mv "TXT/A_Linux/Others/nano τ±¾±༭Ƿ"	"TXT/A_Linux/Others/nano 文本编辑器"
mv "TXT/A_Linux/Others/º̐Ŏļþ"	"TXT/A_Linux/Others/核心文件"
mv "TXT/A_Linux/Others/ԅ»¯"	"TXT/A_Linux/Others/优化"
mv "TXT/A_Linux/Image/Linux Ђ¸?ƺ¼ԋ®ӡ"	"TXT/A_Linux/Image/Linux 下给图片批量加水印"
mv "TXT/A_Linux/LVM/½«һ¸?꓆¶¯µ½­һ¸?³"	"TXT/A_Linux/LVM/将一个卷组移动到另一个系统"
mv "TXT/A_Linux/LVM/Linux rescueģʽЂ˖¶¯¹Ӕ׌VM·ׇ	"TXT/A_Linux/LVM/Linux rescue模式下手动挂载LVM分区"
...
...
mv "TXT/Web/Apache/θվО̙"	"TXT/Web/Apache/网站限速"
mv "TXT/Web/Nginx/nginx ldap ɏ֤"	"TXT/Web/Nginx/nginx ldap 认证"
Ready! I converted 165 files in 1 seconds.

Man page: man-1-convmv


How-to Use LVM Snapshot To Backup MySQL

如果你Mysql的数据存储在LVM逻辑卷上,那么使用 LVM Snapshot 是对Mysql数据取得一个时间点的完全备份的一个低影响行为的一个方法。唯一的困难是,必须保证数据文件处于`安全`的状态(即所有数据已经写到硬盘文件,而不是仅仅存在于内存中);

为什么基于快照备份Mysql是一个好的选择?

大部分场景接近热备份 您可以在应用程序运行时执行这种类型的备份。无需关闭服务,只需设置只读或是类似的操作。

支持所有本地磁盘存储引擎 它适用于MyISAM和Innodb和BDB,它也适用于Solid,PrimeXT和Falcon存储引擎。

低开销 因为它只是文件副本 因此对服务器的开销是最小的

快速备份

易于对数据进行压缩归档备份 将其备份到磁带,FTP或任何网络备份软件;它很容易,因为你只需要复制文件。

快速恢复 恢复时间与将数据恢复和标准MySQL崩溃恢复一样快,并且可以进一步减少。

免费没有额外的商业工具,Innodb热备份需要执行备份。

不过这里也有些不足之处

显然易见这里需要快照的兼容性

可能会需要 root 权限

很难预测停机时间我提到这个解决方案通常是热备份,但糟糕的是,很难估计它是什么时候,它是不是 - FLUSH TABLES WITH READ LOCK 可能需要相当长的时间在具有长查询的系统上完成。

多个卷上的数据的问题 如果您在单独的设备或仅跨越多个卷的数据库上有日志,则会遇到麻烦,因为您无法在所有数据库中获得一致的快照。 一些系统可能能够对许多卷执行原子快照。

下面是是使用LVM Snapshot备份的基本过程

1. 打开多个终端会话,一个用于登陆Mysql 执行相关命令; 一个用于生成LVM 快照

2. 在终端会话1中,连接Mysql 设置读锁;所以不会再有新的数据写入。但是不要使用 `mysqladmin` 执行操作,并确保您的数据库会话保持打开,否则读取锁将在客户端断开连接时立即删除。

FLUSH TABLES WITH READ LOCK;
SHOW MASTER STATUS;    # 重建 Mysql Slave

3. 在另一个终端会话中,创建 Mysql 数据卷的 LVM 快照。在本例中,我们假设 数据目录为 /var/lib/mysql LVM 逻辑卷名称为 /dev/vg0/mysql. 确保快照的空间足够大,以便在执行备份时有足够的空间容纳新数据进入数据库。如果空间给的太小,快照会失效备份也会终止。

lvcreate -L8G -s -n mysql-backup /dev/vg0/mysql

4. 回到之前打开Mysql 连接会话的终端,释放读锁;这样正常的数据操作就恢复了

UNLOCK TABLES;

5. 挂载快照到方便的地方

mkdir -p /mnt/mysql-backup
mount -o nouuid -t xfs /dev/vg0/mysql-backup /mnt/mysql-backup

如果你现在查看 /mnt mysql-backup 的内容,你应该看到一个 /var/lib/mysql 的副本,就像创建快照时的一样。

6. 使用您选择的方法将整个目录复制到您选择的位置。 例如

tar -C /mnt -czf ~/mysql-backup.tar.gz mysql-backup

或者启动一个新的Mysql实例,将数据导出

7. 一旦完成备份, 卸载 并移除快照

umount /mnt/mysql-backup
lvremove -f /dev/vg0/mysql-backup

如上所述,在创建快照时,数据库连接必须保持打开状态,以便保持锁定。编写脚本的唯一方法是使用支持数据库连接的语言。 这里是一个perl的例子。

#!/usr/bin/perl

use DBI;

# Connect to the local database
$dbh = DBI->connect('DBI:mysql:host=localhost;database=mysql', 'root', 'password') || die;

# Flush and lock tables to prepare for LVM snapshot
$dbh->do('FLUSH TABLES WITH READ LOCK;');

# Create LVM snapshot volume
system('lvcreate -L8G -s -n mysqlbackup /dev/vg0/mysql');

# Release table lock
$dbh->do('UNLOCK TABLES;');

# Disconnect from database
$dbh->disconnect();

相关链接

[0] https://dev.mysql.com/doc/refman/5.7/en/backup-methods.html

[1] https://www.percona.com/blog/2006/08/21/using-lvm-for-mysql-backup-and-replication-setup/

[2] https://www.badllama.com/content/mysql-backups-using-lvm-snapshots


Linux 中命令行查看img

习惯了在Linux中通过命令行来解决问题。系统中也没有安装桌面。总不能为了看一张图片来安装一个庞大的桌面吧。好在前人已经考虑到这个问题了。通过 `display` 或者 `eog` 命令可以查看。

那么我们来安装它吧

^_^[19:36:18][zfsu@lucy ~]$display
The program 'display' can be found in the following packages:
 * imagemagick
 * graphicsmagick-imagemagick-compat
Try: sudo apt-get install <selected package>

^_^[19:37:18][zfsu@lucy ~]$sudo apt-get install imagemagick -y

接下来让我们来测试一下

  • Usage:
  • display /path/to/img_name
  • eog /path/to/img_name

20151112201309


Puppet erb template

puppet templates follow the erb templating standard.

The puppet documentation contains an example of how to do a simple if statement.

<% if broadcast != "NONE" %>       
    broadcast <%= broadcast %>
<% end %>

To do an if/else statement, simply add <% else %>

<% if @someclass::someparameter != true %>
    bar = 42
<% else %>
    bar = 0
<% end %>

--  for dynamic content use: <%= %>
--  for another content use: <% %>
-- eg: <% if 1>2 %>


http://stackoverflow.com/questions/6932663/whats-wrong-with-my-simple-if-else

https://docs.puppetlabs.com/puppet/latest/reference/lang_template_erb.html


The Puppet Language Style Guide

Puppet Language Style Guide: Version 2.0.1Puppet: Version 3.7+

(Note: While the style guide maps to Puppet 3.7, many of its recommendations apply to Puppet 3.0.x and up.)

PHP 获取的时间和系统的时间不一致

问题描述:
最近发现自动发送工作日报的那个脚本出现了问题, 发送是大昨天的内容.
可能是系统时间或是服务器时间配置不正确,下面开始逐步排查.

^_^[11:04:26][root@master01 ~]#date
Thu Oct 22 11:05:33 CST 2015
^_^[11:05:33][root@master01 ~]#cat /etc/sysconfig/clock
ZONE="Asia/Shanghai"
#UTC=true
#ARC=false

<?php
//date_default_timezone_set('UTC');
date_default_timezone_set('CST/8.0');

$today = date('Y-m-d H:i:s');
$yesterday = date('Y-m-d H:i:s',time()-86400);
echo "$today\n";
echo "$yesterday";
?>


^_^[11:06:09][root@master01 ~]#php test.php
2015-10-21 23:06:16
2015-10-20 23:06:16

^_^[11:07:35][root@master01 ~]#date -R
Thu, 22 Oct 2015 11:10:14 +0800


奇le个怪le, 系统区时的时间是对的,为啥时间不对呢?
再来看一下php 的 timezone

咔咔,居然错误在这里

[Date]
; Defines the default timezone used by the date functions
; http://www.php.net/manual/en/datetime.configuration.php#ini.date.timezone
date.timezone = 'Asia/Shanghai'
date.timezone = 'America/New_York'

将第二个注释掉再来看,这下对了O(∩_∩)O哈!

^_^[11:15:06][root@master01 ~]#php test.php
2015-10-22 11:15:12
2015-10-21 11:15:12

reference:
发现时区确实错误,进行修改
/bin/cp /etc/localtime{,.old}
/bin/cp /usr/share/zoneinfo/Asia/Shanghai      /etc/localtime

命令行修改时区
tzselect

一些概念:

1、硬件时钟(也叫BIOS时钟、CMOS时钟)
和CPU和系统无关的,单独由一个电池和晶振运行的时钟,即使关机也会走。
硬件时钟只有当系统启动的时候才会读取。
hwclock --show # 显示硬件时间
hwclock -s     # 系统时钟和硬件时钟同步

2、系统时间
Linux内核启动以后的时间,保持一个时间中断,用1970年1月1日00:00:00开始的秒数计数。这是我们平时看到时间。

3、时区
在某个时刻,世界各地的人,看到的时间都不同的。比如你同样适用gmail,大陆的人看到是 20:00,北美的人,可能是07:00.时刻还是一样的,但是由于时区不同,看到的时间显示就不同。
同样,我们机器里,可以系统时间一样的,但是不同的用户,可以设置不同的时区,看到的时间也不同。当然,系统本身有一个缺省时区。
在Redhat或者CentOS下,是使用  /etc/sysconfig/clock里的 ZONE="Asia/Shanghai" 选项配置的

4、UTC/GMT还是本地时间
系统启动的时候,使用/sbin/hwclock 从硬件时钟读取时间,关机的时候,会回写硬件时钟。
这里就有一个问题,读取和回写的时候,采用什么标准,是UTC还是本地时间?
一般情况下,都使用UTC/GMT,这样可以自动处理夏令时间(中国地方太大,已经作废)。
使用UTC的唯一坏处,是当你的计算机是多系统时,如果启动Windows,会导致时间不对。

5、时间同步
一般使用 ntp 协议进行同步,可以保持毫秒级的时差。

http://php.net/manual/zh/function.date.php
http://bbs.csdn.net/topics/390023846

What is Couchbase Server

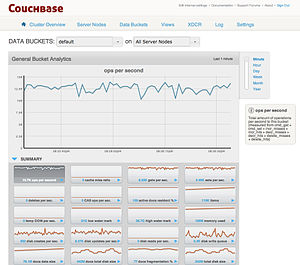
Couchbase Server Screenshot.jpg
Developer(s) Couchbase, Inc.
Stable release 3.0.3 / March 28, 2015
Written in C++, Erlang, C[1]
Operating system Cross-platform
Type distributed key-value / document database system
License Apache License (Open Source edition), Proprietary (Free Community edition and Paid Enterprise edition)
Website www.couchbase.com

Couchbase Server, originally known as Membase, is an open-source, distributed (shared-nothing architecture) NoSQL document-oriented database that is optimized for interactive applications. These applications must serve many concurrent users by creating, storing, retrieving, aggregating, manipulating and presenting data. In support of these kinds of application needs, Couchbase is designed to provide easy-to-scale key-value or document access with low latency and high sustained throughput. It is designed to be clustered from a single machine to very large-scale deployments spanning many machines.

Couchbase Server provides on-the-wire client protocol compatibility with memcached,[2] but is designed to add disk persistence, data replication, live cluster reconfiguration, rebalancing and multitenancy with data partitioning.

In the parlance of Eric Brewer’s CAP theorem, Couchbase is a CP type system meaning it provides consistency and partition tolerance. However Couchbase Server can be set up as an AP system with multiple clusters using XDCR (Cross Data Center Replication).

Contents

Product history

Membase was developed by several leaders of the memcached project, who had founded a company, NorthScale, to develop a key-value store with the simplicity, speed, and scalability of memcached, but also provided the storage, persistence and querying capabilities of a database. The original membase source code was contributed by NorthScale, and project co-sponsors Zynga and NHN to a new project on membase.org in June 2010.

On February 8, 2011, the Membase project founders and Membase, Inc. announced a merger with CouchOne (a company with many of the principal players behind CouchDB) with an associated project merger. The merged company was called Couchbase, Inc. In January 2012, Couchbase released Couchbase Server 1.8. On December 2012, Couchbase Server 2.0 was released, with new features including a new JSON document store, indexing and querying, incremental MapReduce and cross datacenter replication.[3]

High-level architecture

Every Couchbase node is architecturally identical consisting of a data manager and cluster manager component.

Cluster manager

The cluster manager supervises the configuration and behavior of all the servers in a Couchbase cluster. It configures and supervises internode behavior like managing replication streams and rebalancing operations. It also provides metric aggregation and consensus functions for the cluster, and a RESTful cluster management API. The cluster manager is built atop Erlang/OTP, a proven environment for building and operating fault-tolerant distributed systems.

Replication and failover

  • Multi-model replication support: Peer-to-peer replication support with underlying architecture supporting master-slave replication
  • Configurable replication count: Balance resource utilization with availability requirements
  • High-speed failover: Fast failover to replicated items based upon request
  • XDCR: Cross Data Centre Replication [4]

Data manager

The data manager is responsible for storing and retrieving documents in response to data operations from applications.

  • Asynchronously writes data to disk after acknowledging write to client. In version 1.7 and later, applications can ensure data is synced to more than one server, while disk writes are still asynchronous.
    • Tunables to define item ages that affect when data is persisted.
  • Supports working set greater than a memory quota per "node" or "bucket"
    • Tunables to affect how max memory and migration from main-memory to disk is handled.
  • Configurable “tap” interface: External systems can subscribe to filtered data streams supporting, for example, full text search indexing, data analytics or archiving.[5]

Data format

A document is the most basic unit of data manipulation in Couchbase Server. Documents are stored in JSON document format with no predefined schemas.

Object-managed cache

Couchbase Server includes a built-in multithreaded object-managed cache that implements memcached compatible APIs such as get, set, delete, append, prepend etc.

Storage engine design

Couchbase Server has a tail-append storage design that is immune to data corruption, OOM killers or sudden loss of power. ["immune" to sudden loss of power is a claim that would need to be substantiated or documented, since appending to a file could still result in loss of data if power was interrupted in the middle of a disk write operation] Data is written to the data file in an append-only manner, which enables Couchbase to do mostly sequential writes for update, and provide an optimized access patterns for disk I/O.

Performance

Cisco published a benchmark that measures the latency and throughput of Couchbase Server [6] with a mixed workload. Another performance benchmark done by Altoros, compares Couchbase Server with other NoSQL database solutions.[7]

Licensing and support

Couchbase Server is a packaged version of Couchbase's open source technology and is available in two variants: a Community Edition without recent bug fixes as Open Source (Apache 2.0 license[8]) distribution, and an Enterprise Edition for commercial use.[9]

Couchbase Server builds are available for Ubuntu, Debian, Red Hat, Windows and Mac OS X platforms.

See also

Bibliography

References


  1. "Couchbase Server Editions". Couchbase.

External links

处理Vim中粘贴文本的格式问题

在Vim插入模式下,我们可以使用操作系统的复制粘贴命令来将一些外部的文本拷贝至正在编辑的文件中。然而,有时候这样直接粘贴过来的多行文本,格式会乱掉。仔细观察,我们发现其实格式只是缩进的问题。这时候,可以有几种办法:

  1. Visual模式下使用=重新格式化:首先按v键进入Visual模式,然后通过方向键等选中粘贴过来的所有行,再按=键Vim就会自动重新格式化这些行的缩进了。这种方法对于粘贴过来的代码比较适用,如果粘贴的文本不是代码,并且还有特定的缩进意义的话,则不大适用。
  2. 关闭自动缩进粘贴过来的文本缩进乱了的原因,有可能是Vim设置了"set cindent"(C风格的自动缩进)。那么,可以尝试:set nocindent暂时关闭自动缩进再粘贴。
  3. 粘贴模式方法2并不总是管用,因为缩进乱了的原因还可能是Vim开启了根据文件类型自动缩进的插件("filetype plugin indent on")。其实,Vim本身提供了粘贴插入模式("Insert (paste)")可以很好的解决问题。:set paste使得插入模式切换为粘贴插入模式,这时候再进入插入模式后,粘贴外部的多行文本就不会有缩进问题了。粘贴完毕后,可以:set nopaste恢复。如果经常需要反复切换的话,还可以设置切换的快捷键,如设置:set pastetoggle=<F2>,可以使用F2功能键来切换paste模式。

    另外,还可以通过以下三行设置,使得快捷键切换时在左下方显示当前模式。更多可参考:help paste:help pastetoggle

    nnoremap <F2> :set invpaste paste?<CR>
    set pastetoggle=<F2>
    set showmode

另外,除了Windows的<Ctrl-C><Ctrl-V>复制粘贴快捷键之外,还有另外一套快捷键<Ctrl-Insert><Shift-Insert>,这是Windows和Linux(起码在我的RedHat上如此)上都可以使用的。

本文出自 夜惊心的博客